David G.
-
Posts
11,326 -
Joined
-
Last visited
Content Type
Profiles
Forums
Events
Gallery
Everything posted by David G.
-
A great looking pair! David G.
-

Ford GT Monogram, 1/25
David G. replied to Eric Macleod's topic in WIP: Other Racing: Road Racing, Land Speed Racers
Looks like you're off to a great start! David G. -
Wow! That's the best built-up example of that kit that I've seen. Maybe the only built-up example. David G.
-
That's a snappy bit of engineering Si! It must be very gratifying to have that finally worked out. David G.
-
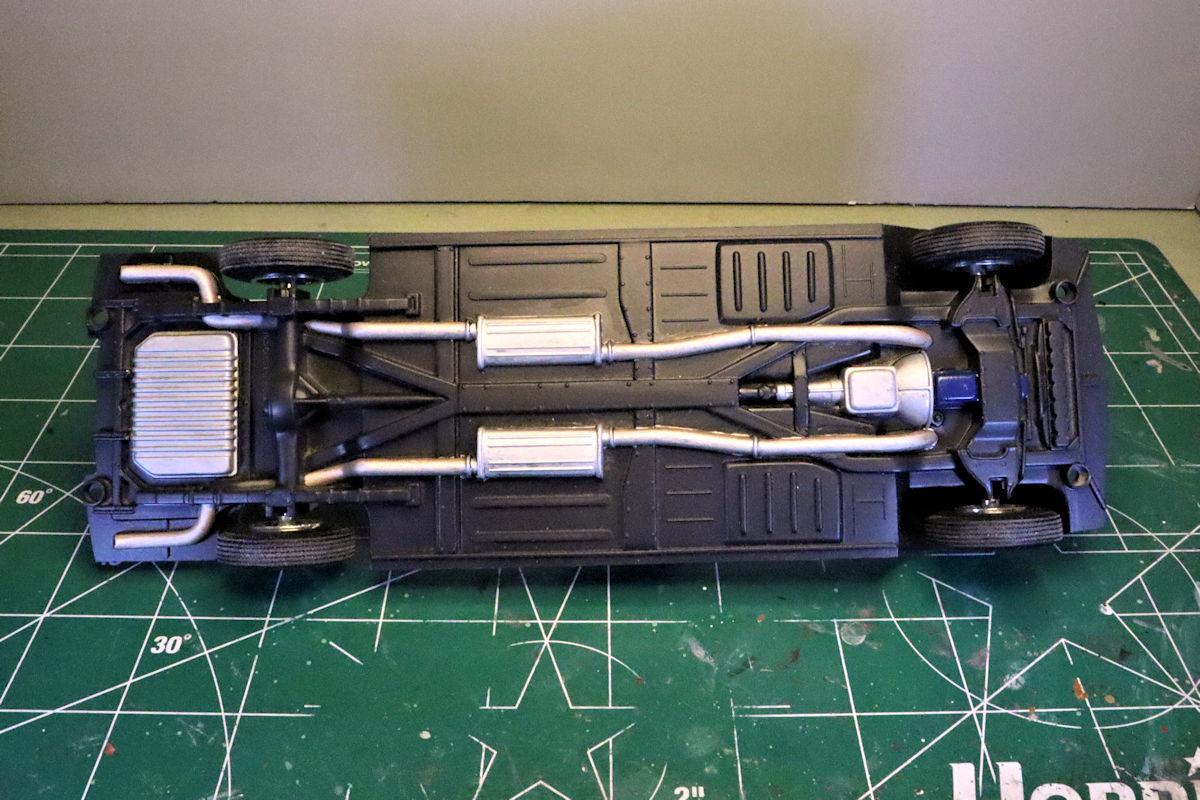
Hello Everybody! I'm still working on the interior details. In the meantime I've done some basic detail painting on the basic chassis plate. I may do a little more to clean it up, or I may not. I haven't decided yet. But I'll probably do at least a little light weathering. As always, thanks for taking the time to look and please feel free to comment. David G.

-
Gorgeous color and the paintwork looks great too! David G.
-
An excellent build-up of a unique historic kit, Well Done! David G.
-
Beautiful color, nicely detailed and built, Well Done! David G.
-
Excellent work on the stripes! Somehow, it seems like painting them would be a little easier than trying to wrangle a set of large decals into place. David G.
-
Excellent work so far. I love the color! It reminds me of the colors that Mattel was using on their Hot Wheels cars back in the day. David G.
-
Revell 1968 Dodge Charger R/T 1/25 Scale in Plum Crazy Purple.
David G. replied to Dragonhawk1066's topic in Model Cars
Paint, fit and finish all look just about perfect! Well Done! David G. -
I'm sorry to learn of your heath issues, I hope things are better for you now. Excellent color choice and the engine looks great so far. David G.
-
Sometimes I have to wait for my skills to catch up with my ambitions. But I do have some solid plans for my next move on this one. Thanks for your comment Nigel. David G.
-
Thank you Chaz. Thanks Greg, I appreciate your comment. Thanks Carl. David G.
-
Gorgeous paint and foil work! That was quite a novel approach to masking for the stripes. I've used plastic wrap for similar shoots, I will have to keep this in mind for future use. David G.
-
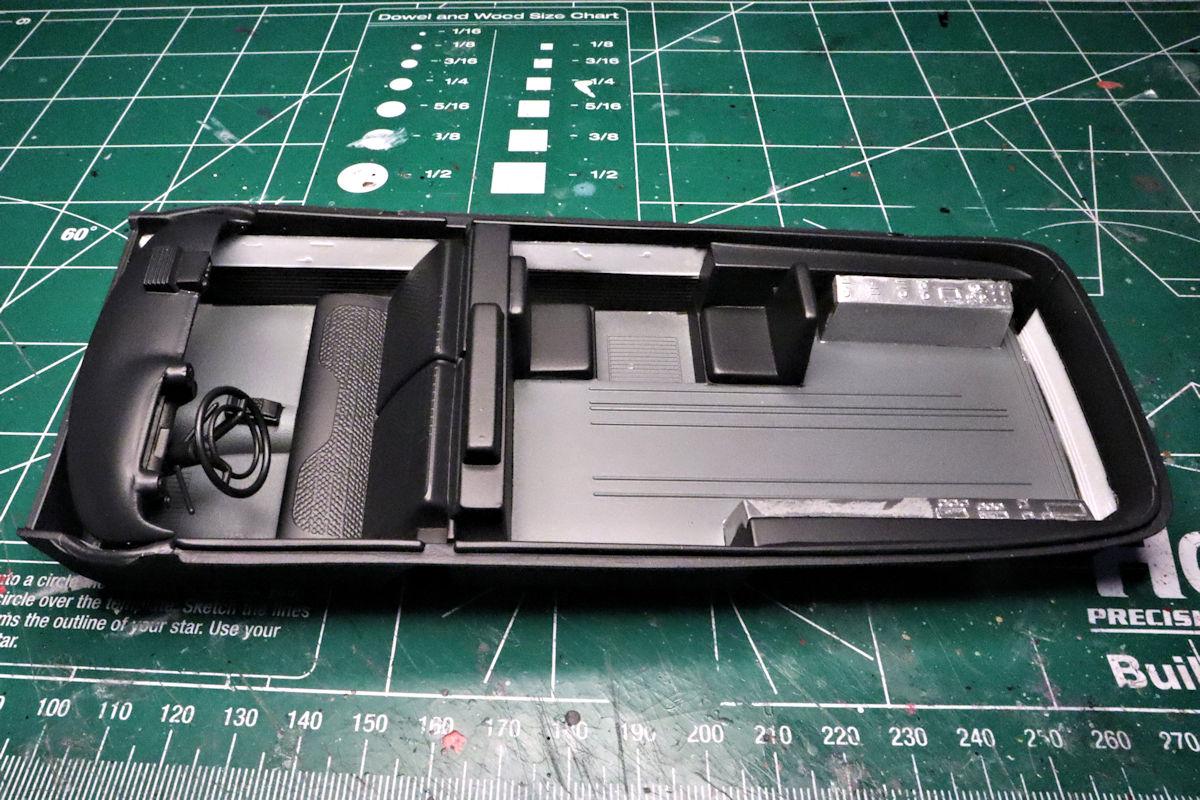
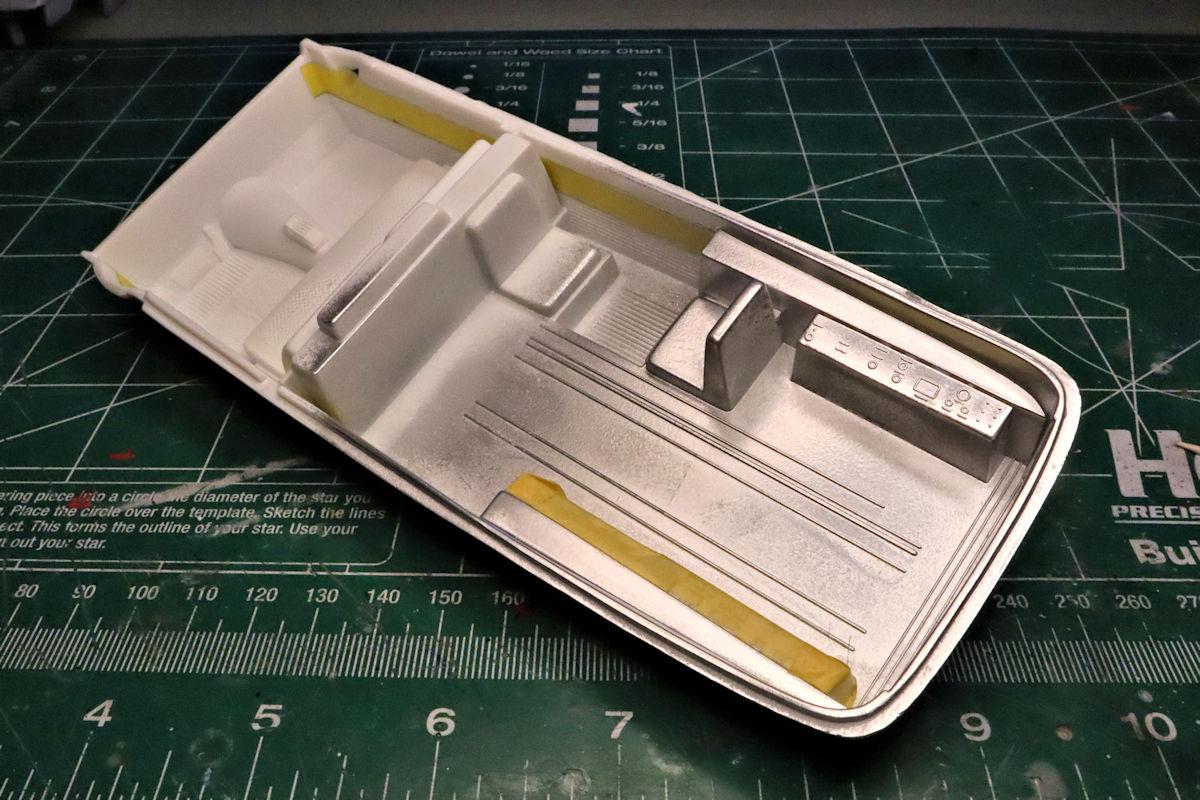
Hello Everybody! I was able to get a little more work done so here are some more photos. First is laying out and masking the basic colors on the interior. Tamiya white primer masked for the white portions on the door panels and Dupli-Color Chrome for the for the computers. Tamiya AS-10 Ocean Gray for the carpet and rear deck is applied and being masked to shoot the Dupli-Color Flat Black black for the seats and door panels. Here's the interior with all the basic colors shot and the masking removed. I did get a little tape scarring on the computer consoles but I have a plan to deal with that. The next step is some detail painting and maybe a few more scratch-built bits and pieces to add casual visual interest. Most of this won't be visible through the tinted windows after final assembly so I don't plan on going over the top with the added details. And of course, the obligatory Test-Fit! As always, thanks for taking the time to look and please feel free to comment. David G.
-
I agree. The two good things that the Polar Lights version has is a stock rear bumper and wheels. The AMT version has a rear step bumper and Western Smoothie style wheels. Overall, the AMT kit assembles better too. I ended up buying one Polar Lights kit and two by AMT. My plan is to build the original Ecto-1 using mostly the Polar Lights kit, convert one of the AMT kits back into a standard hearse and the other AMT kit either into a flower car or a standard ambulance. Though I'm currently working on the first two plans, I'm not so sure about the third at this point. I'm also very curious to see what this new Surf Shark version has to offer. David G.
-
Chassis, engine, body work and paint all look great so far. David G.
-
Looks great! Excellent idea for the top, it looks the part. David G.
-
Nicely Done! David G.
-
Nice rescue on the paint error! That's a perfect color for a car of that era. David G.
-
Top quality work as always Bill! David G.
-
If anyone can work this kit into a quality build, it's you Gareth. I can't wait to see where you go with this, best of luck with it. David G.
-
Thank you Scott. You may be correct regarding the seat placement. Working that out is part of the reason for my most recent building break. Most of the hearses I've driven have had a bit of stowage space behind the seat, usually a foot or so. This one would be closer to two feet. That does seem to be a bit too much. But then again, I've never driven a '59 Cadillac hearse. Given that the seat should only be so far from the dashboard and the dashboard has a very fixed position, I was thinking that the headwall in the cargo area is just too far back. I may remove and replace it but I'll need to build in a little more structural integrity first. At this point, I'm thinking that the best way to go is to get the driver's area secure and stable first and work backward from there. Thanks for your comment Scott, it struck a spark in my thought process and helped me come up with some new ideas. David G.
-
Thank you Mario. Yes, this could be converted into an ambulance but it would take some modification. The computer equipment would have to be removed from the cargo area and you'd have to find some period appropriate emergency lights, but it could be done. Hi Carl, thanks for your comment. The thickness of the chrome on the bumper did cause some interference between the locating tabs and their slots. I would have had to file the tabs or open the slots to get a proper fit. Even without the issue caused by the improper fin alignment. Between those two issues, there would have been just no way to get a satisfactory fit on the bumper without some modification or correction. I just attribute this to the age of the molds. Thanks again, David G.