David G.
-
Posts
11,326 -
Joined
-
Last visited
Content Type
Profiles
Forums
Events
Gallery
Everything posted by David G.
-
That is one sweet Chevy! David G.
-

Nemo's Car-The League of Extraordinary Gentlemen.
David G. replied to carbuilder1950's topic in Model Cars
Spectacular Work, every detail looks perfect! I can't tell you how much I would like to get one of these, thanks for sharing yours with us. David G. -
Great looking paint and detail, excellent assembly, nicely done! David G.
-
Looks great! The patina is very convincing, love all the added details. David G.
-
Thanks Bob. Thank you Scott. I also have a couple of more kits, both the AMT version of Ecto-1A. One of which I've been working on converting back into a hearse, here's a link. It's been a while since I worked on it but I plan on cracking back into it after I wrap this one up. Thanks Steve. I remember seeing that one. I remember asking you about the custom decals. It reminds me of one of those promotional parade vehicles that companies used to have made for them. Thanks for posting it. Thanks again, David G.
-
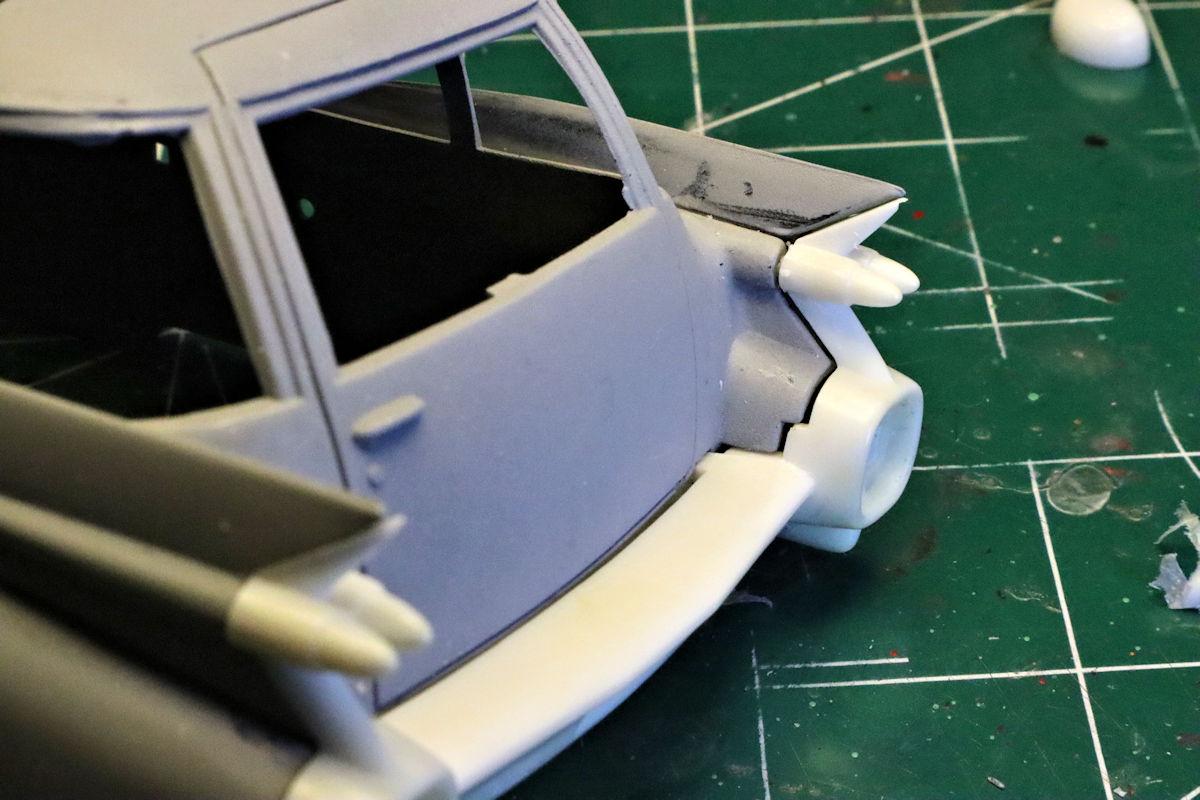
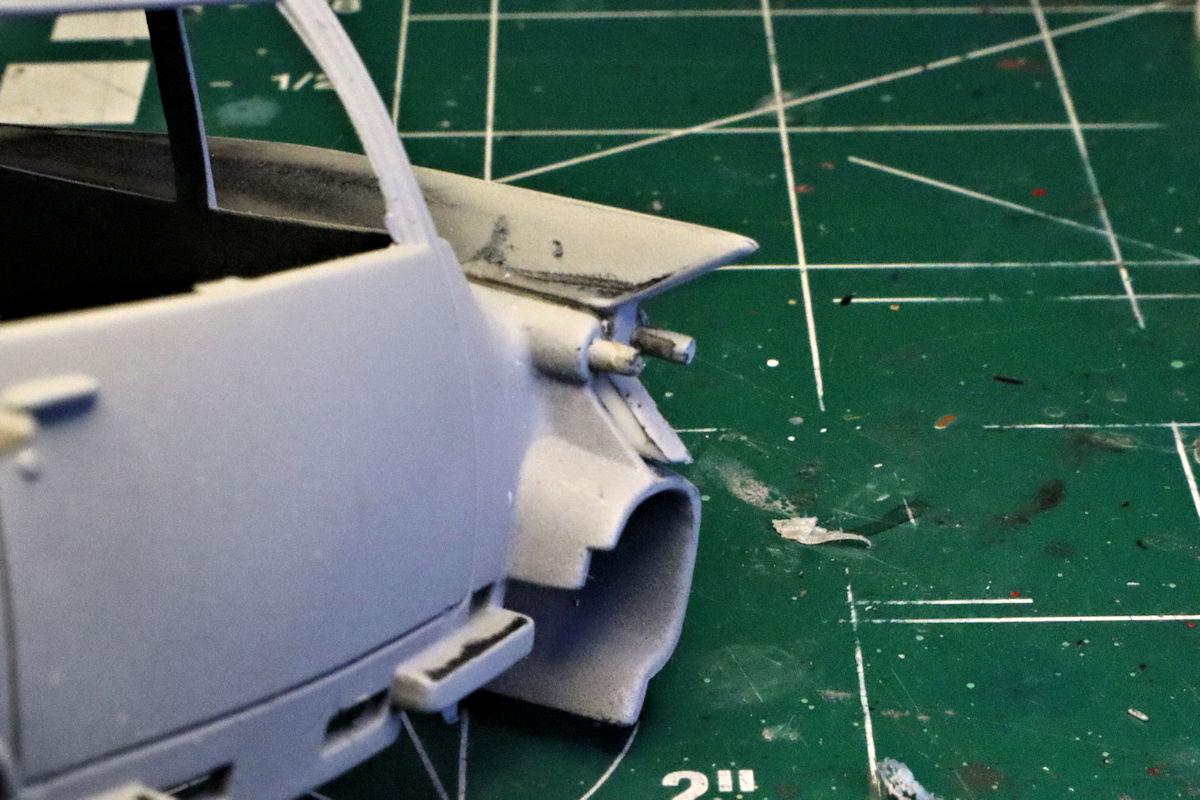
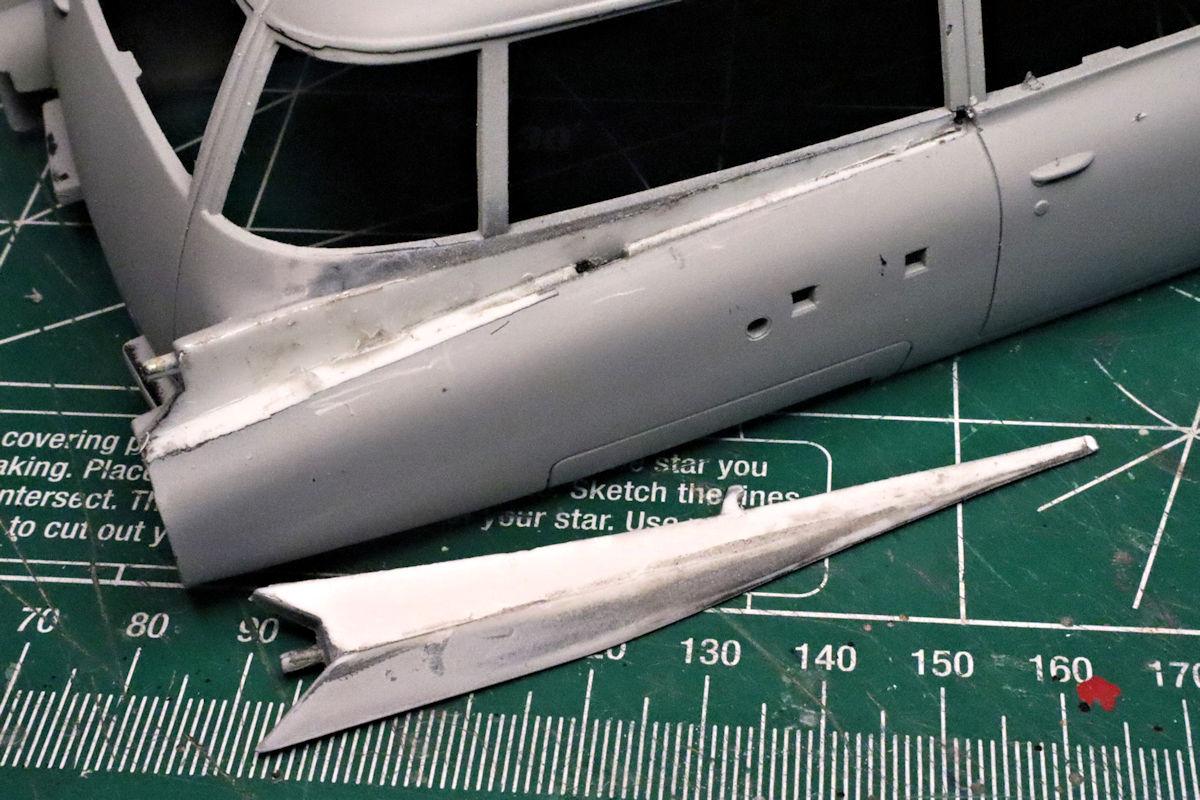
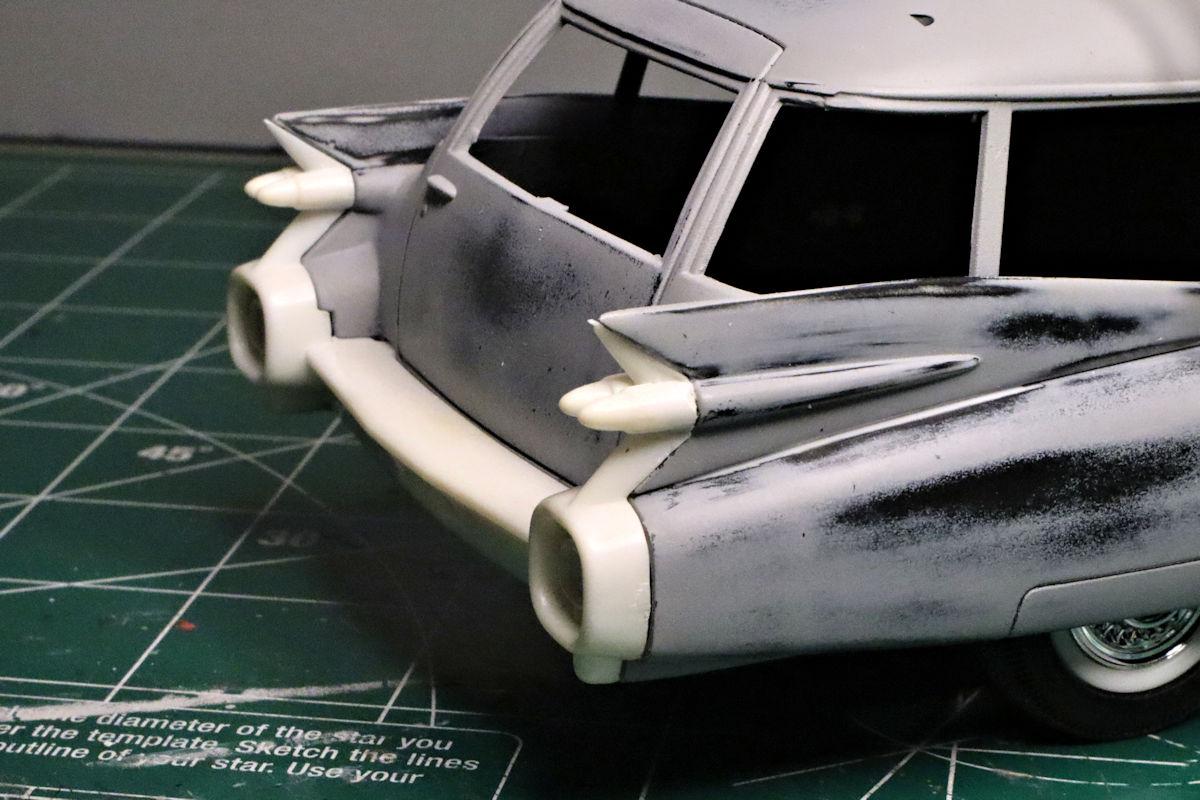
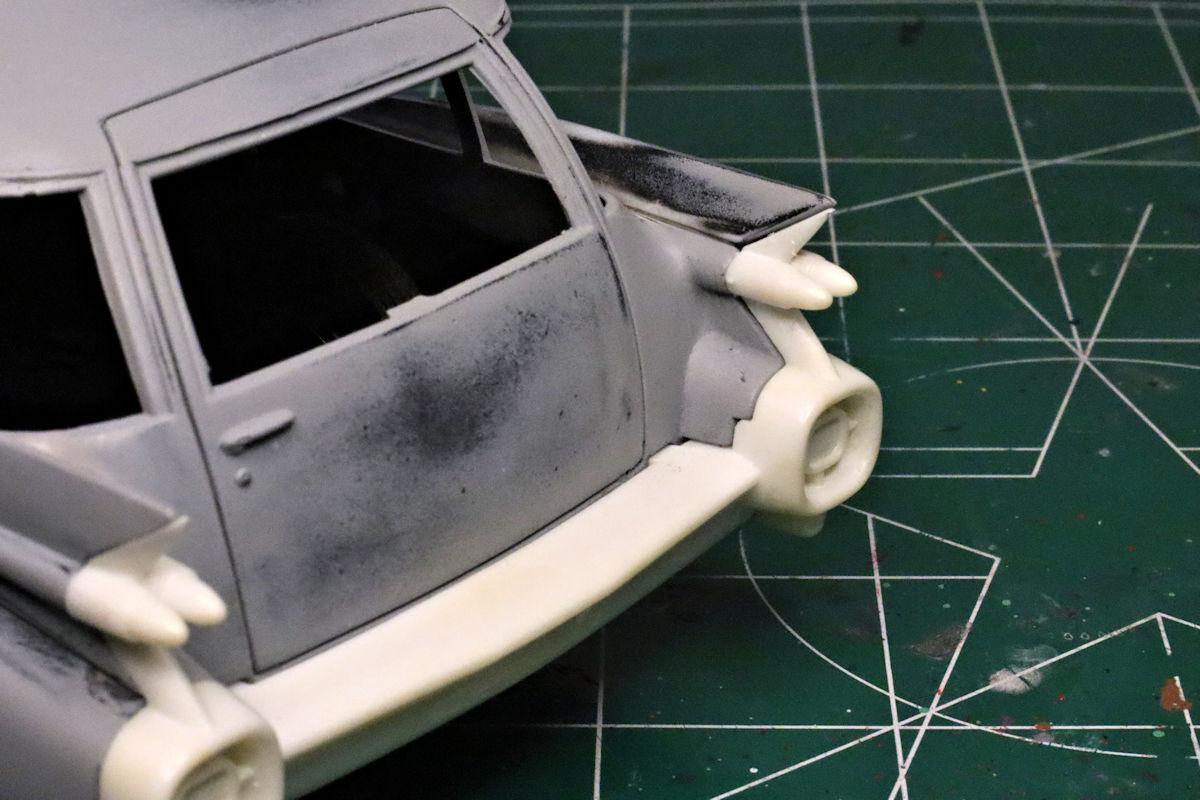
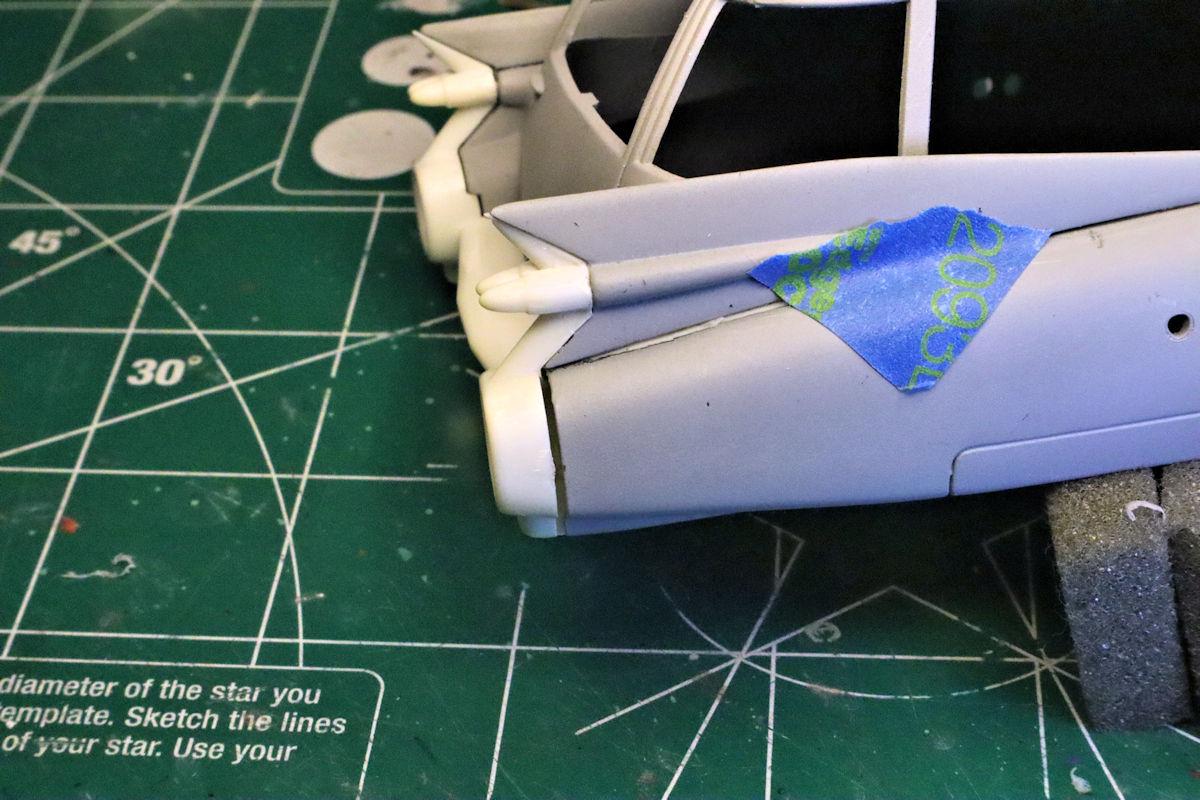
Hello Everybody! Welcome to the "Fun With Fins" episode. Fitting and installing the tailfins requires a bit of care and attention to insure proper positioning. At least for me it did. One of the first actions I took was stripping the "chrome" from the rear bumper. Not only did the thickness of the coating significantly interfere with the fit, there were noticeable drips and sags in the finish. ? Since both fins need to be fitted simultaneously with the rear bumper to assure proper location, I tacked them in place with Tamiya Extra Thin Cement to allow myself a little working time. On the first pass, there was a noticeable gap between the lower bumper pods and the body. While the gap on the inboard side was even along the entire mating surface. This told me that the fin pieces were too far back, preventing the bumper from fitting properly. The first thing I did was cut off the aforementioned locating tabs at the front of the fin inserts (finserts? ). While this allowed the fins to fit more closely at the front, it didn't move them forward enough to entirely address the fit issue. I also had to file about 2 mm from the front of slot the at the top of both fenders to cover the rest of the distance. I even considered cutting away both the locating tabs entirely. This may have even worked better but I decided to keep the ones at the bottom to help hold the pieces in place as the cement cured. In this shot, the top of the fin is a tipped a little outward. I was able to mostly correct this by clamping it in place during the cure. Fitting these and installing these fin pieces used up an entire build session. But correcting such an obvious problem was certainly worth the time and effort. After all, that's what model building is all about. As always, thanks for taking the time to look and please feel free to comment. David G.

-
Thank you Steve, I appreciate your comment. If you have any photos of your ambulance conversion, feel free to post them. I'd love to see 'em. David G.
-
Tamiya Toyota GT One IS DONE !!!
David G. replied to Fifer's topic in Other Racing: Road Racing, Salt Flat Racers
It looks perfect! Crazy amount of detail in the engine bay. David G. -
Way beyond cool! David G.
-
Nice touch with the marker light bezels. I'll have to try that technique some day. David G.
-
Still, it's a nice looking build. David G.
-
Beautiful! Often, the tiniest details make the biggest difference. David G.
-
Jimmy Flintstone 1954 Metro Van
David G. replied to PatW's topic in Model Trucks: Pickups, Vans, SUVs, Light Commercial
Nicely Done! Your weathering is very convincing. David G. -
Thanks Gareth. Do you have any photos of that conversion? I'd be interested in seeing how it came out. David G.
-
Hello Everybody! My next project is the Ghostbusters Ecto-1 snap kit by Polar Lights. This is a simplified version of the movie car but still an adequate representation. It should provide a good platform for a skilled builder to to add as much detail as they want. I do plan to bump up the detail a bit here and there, I'll have to see how it goes. The first order of business is a test fit in the hope of identifying any potential problem areas. Ah-Ha! Here's one here. The locating tabs on the forward ends of the fin pieces seem to interfere with the positioning. They may have to go. But in the meantime, it's on to the basic body prep. First some primer. Then some sanding. Given the age of the molds, the body castings aren't too bad. Just some standard parting lines. That's all for now. As always, thanks for taking the time to look and please feel free to comment. David G.
-
That came out great! The wheels and tires do a lot for the visual appeal. David G.
-
Sweet little Bug! David G.
-
Nice progress on this one. The engine bay looks great. David G.
-
Looks great! So much detail. I like the idea you came up to represent the clutch. David G.
-
The chassis looks phenomenal! Great color variation and weathering. David G.
-
Wow! Excellent work on the body mods. It looks like it came out of the box that way. David G.
-
The paint and decals look great! This is going to be one sweet cruiser. David G.
-
I'm finally caught up on this one. Everything looks great Bob. David G.
-
I hope all goes smoothly! David G.
-
Nice work getting that engine to fit, looks great! David G.