Bills72sj
-
Posts
4,586 -
Joined
-
Last visited
Content Type
Profiles
Forums
Events
Gallery
Everything posted by Bills72sj
-
 Yep, that one is nice. I would not kick it out of the garage even if it is a Chevy.
 -
New Policy Regarding Inappropriate Posts
Bills72sj replied to Dave Ambrose's topic in How To Use This Board
Thank you for your efforts to keep this forum clean. I for one, greatly appreciate it. -
Thank you Ken.
-
Thank you Larry. Thank you Brian
-
Gorgeous Chargers. For the dust, I use one of my wife's discarded make up brushes and (breath) blowing as I dust it.
-
Thank you Chris. Thank you David. I tried to get the details right. Thank you JC. Thank you Kerry. Thank you Mario. I had visions of pairing them together early on. Thank you Phillip. Thank you Lucas.
-
Congratz on a job well done.
-
I like this. I may have to get me one.
-
My completed covid builds
Bills72sj replied to 53gmc's topic in Model Trucks: Big Rigs and Heavy Equipment
Very impressive. I fortunately didn't have to move but I still didn't get nearly as much done under similar circumstances. -
Very well executed. That exhaust system is crazy. Headers without 4 into 1 collector, a single pipe, then a muffler to warm up the gas tank. That is some weird engineering. Nice job though.
-
Thanks Jeff. I am still debating what is next on the agenda to build. I have not decided if I will tackle my two Superbirds or batch build something else. Than you Dan. Thank you Doug. Fortunately it fits in my display cabinet.
-
Thank you Jeff.
-
This one is done and submitted under Big Rigs and Heavy Equipment.
-
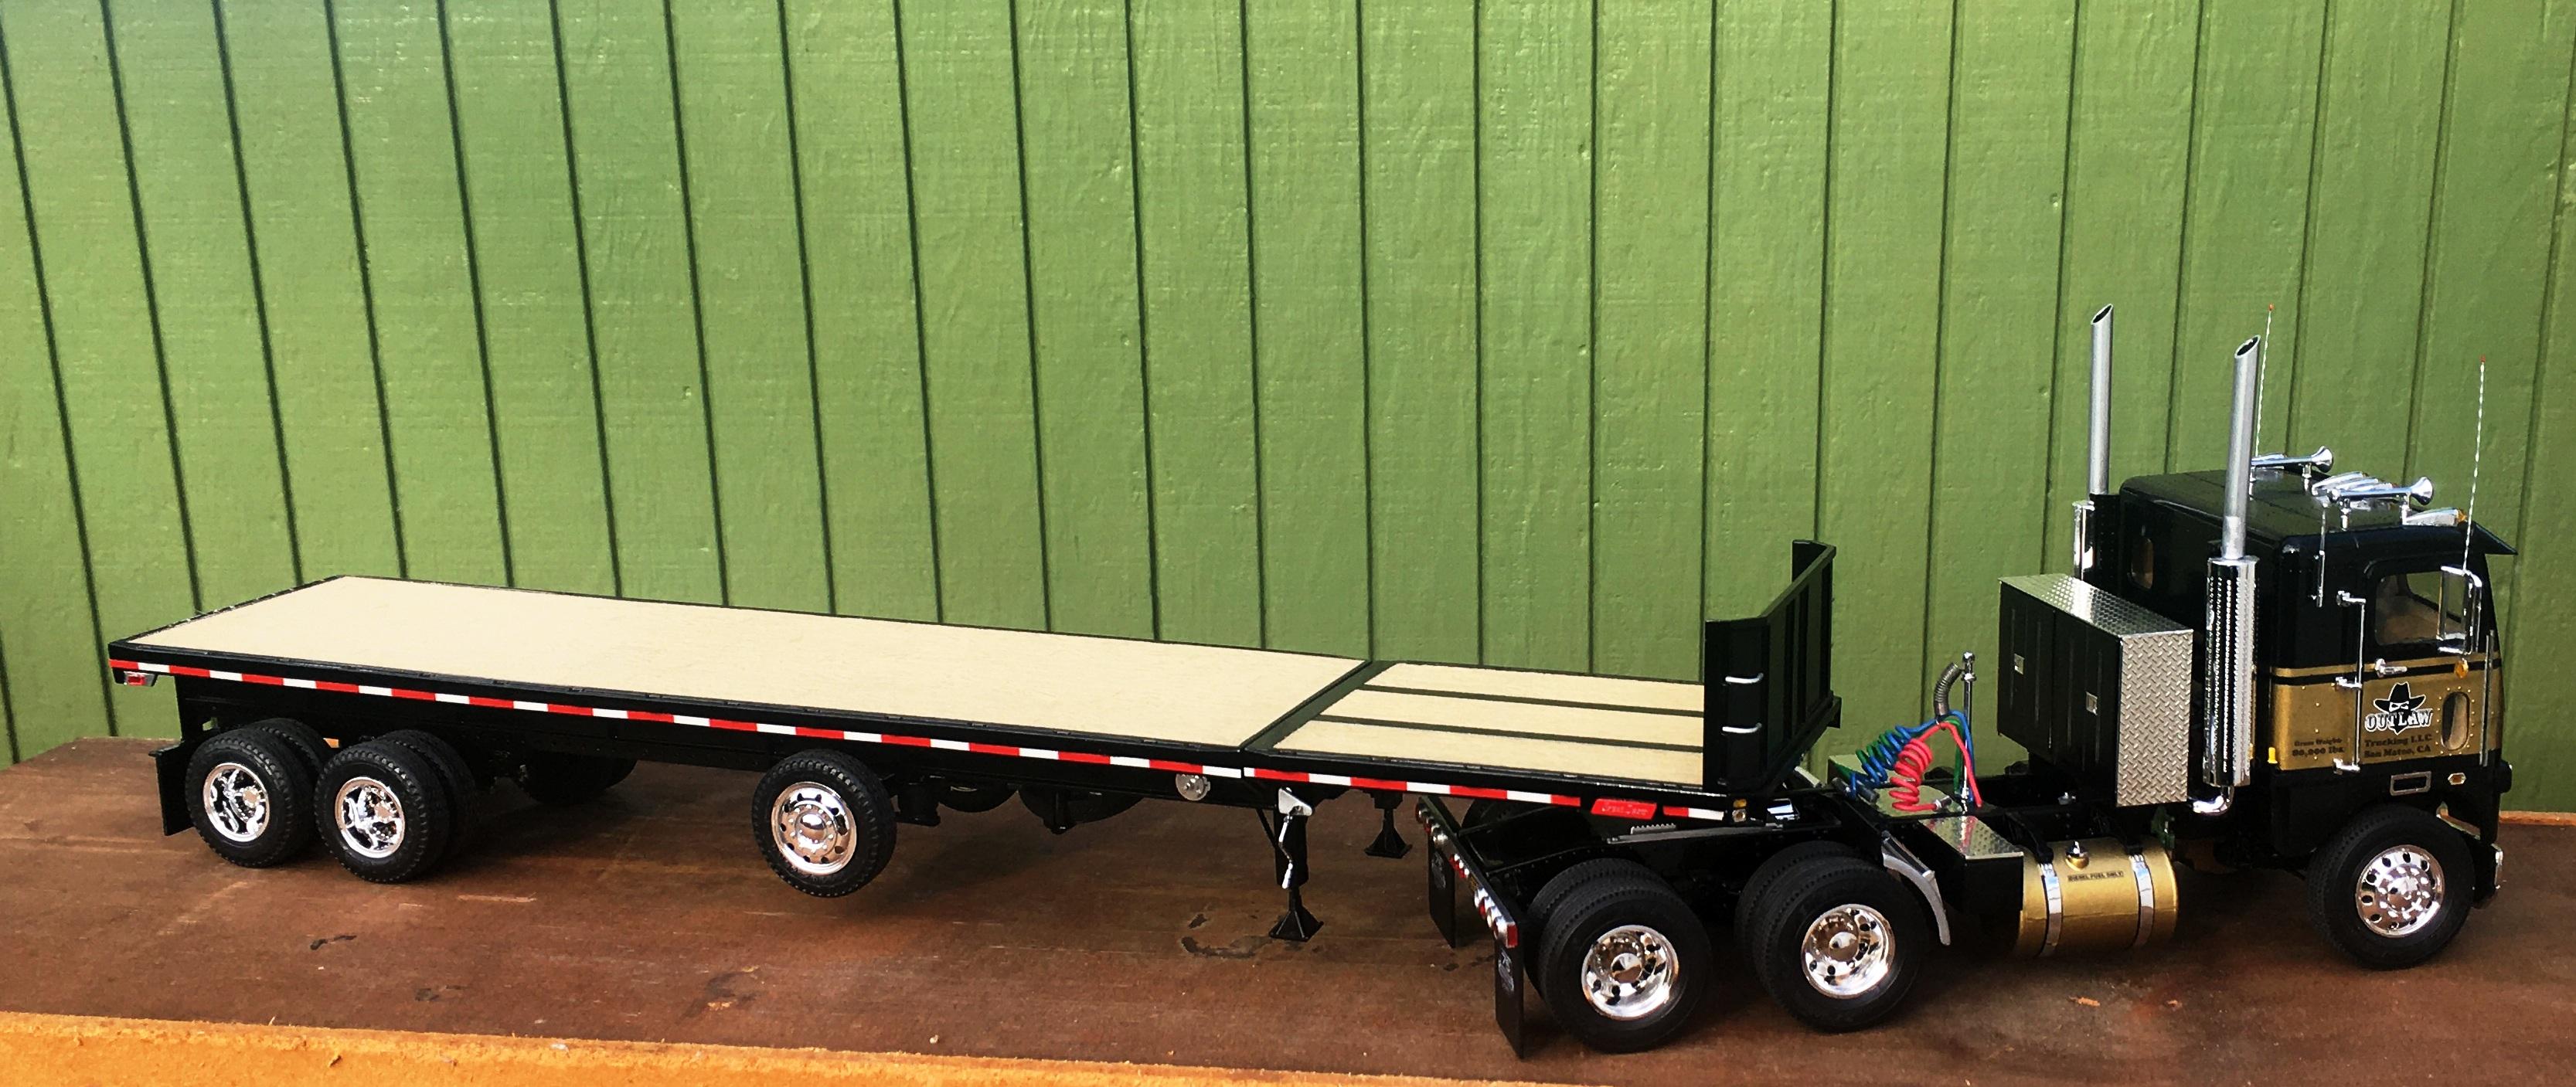
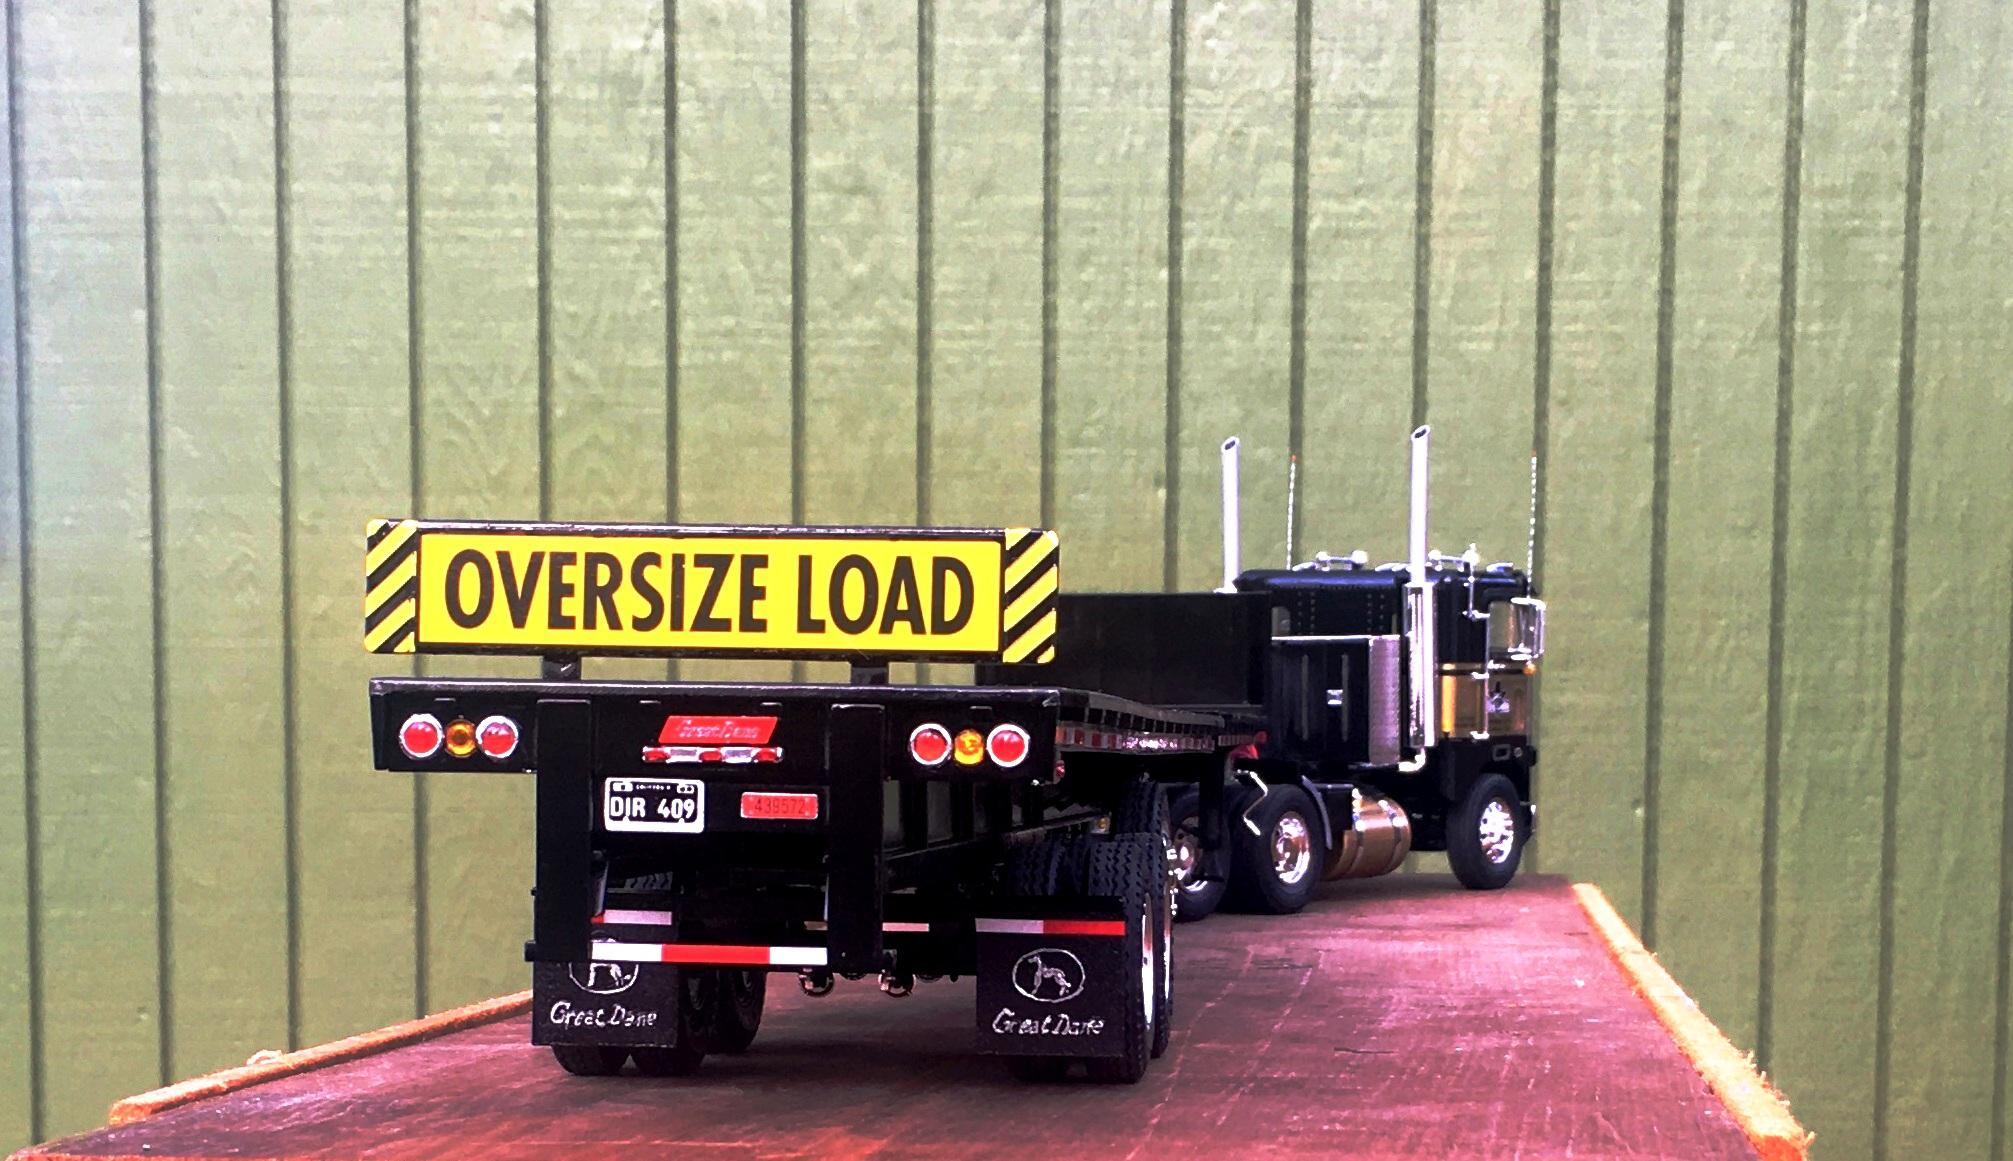
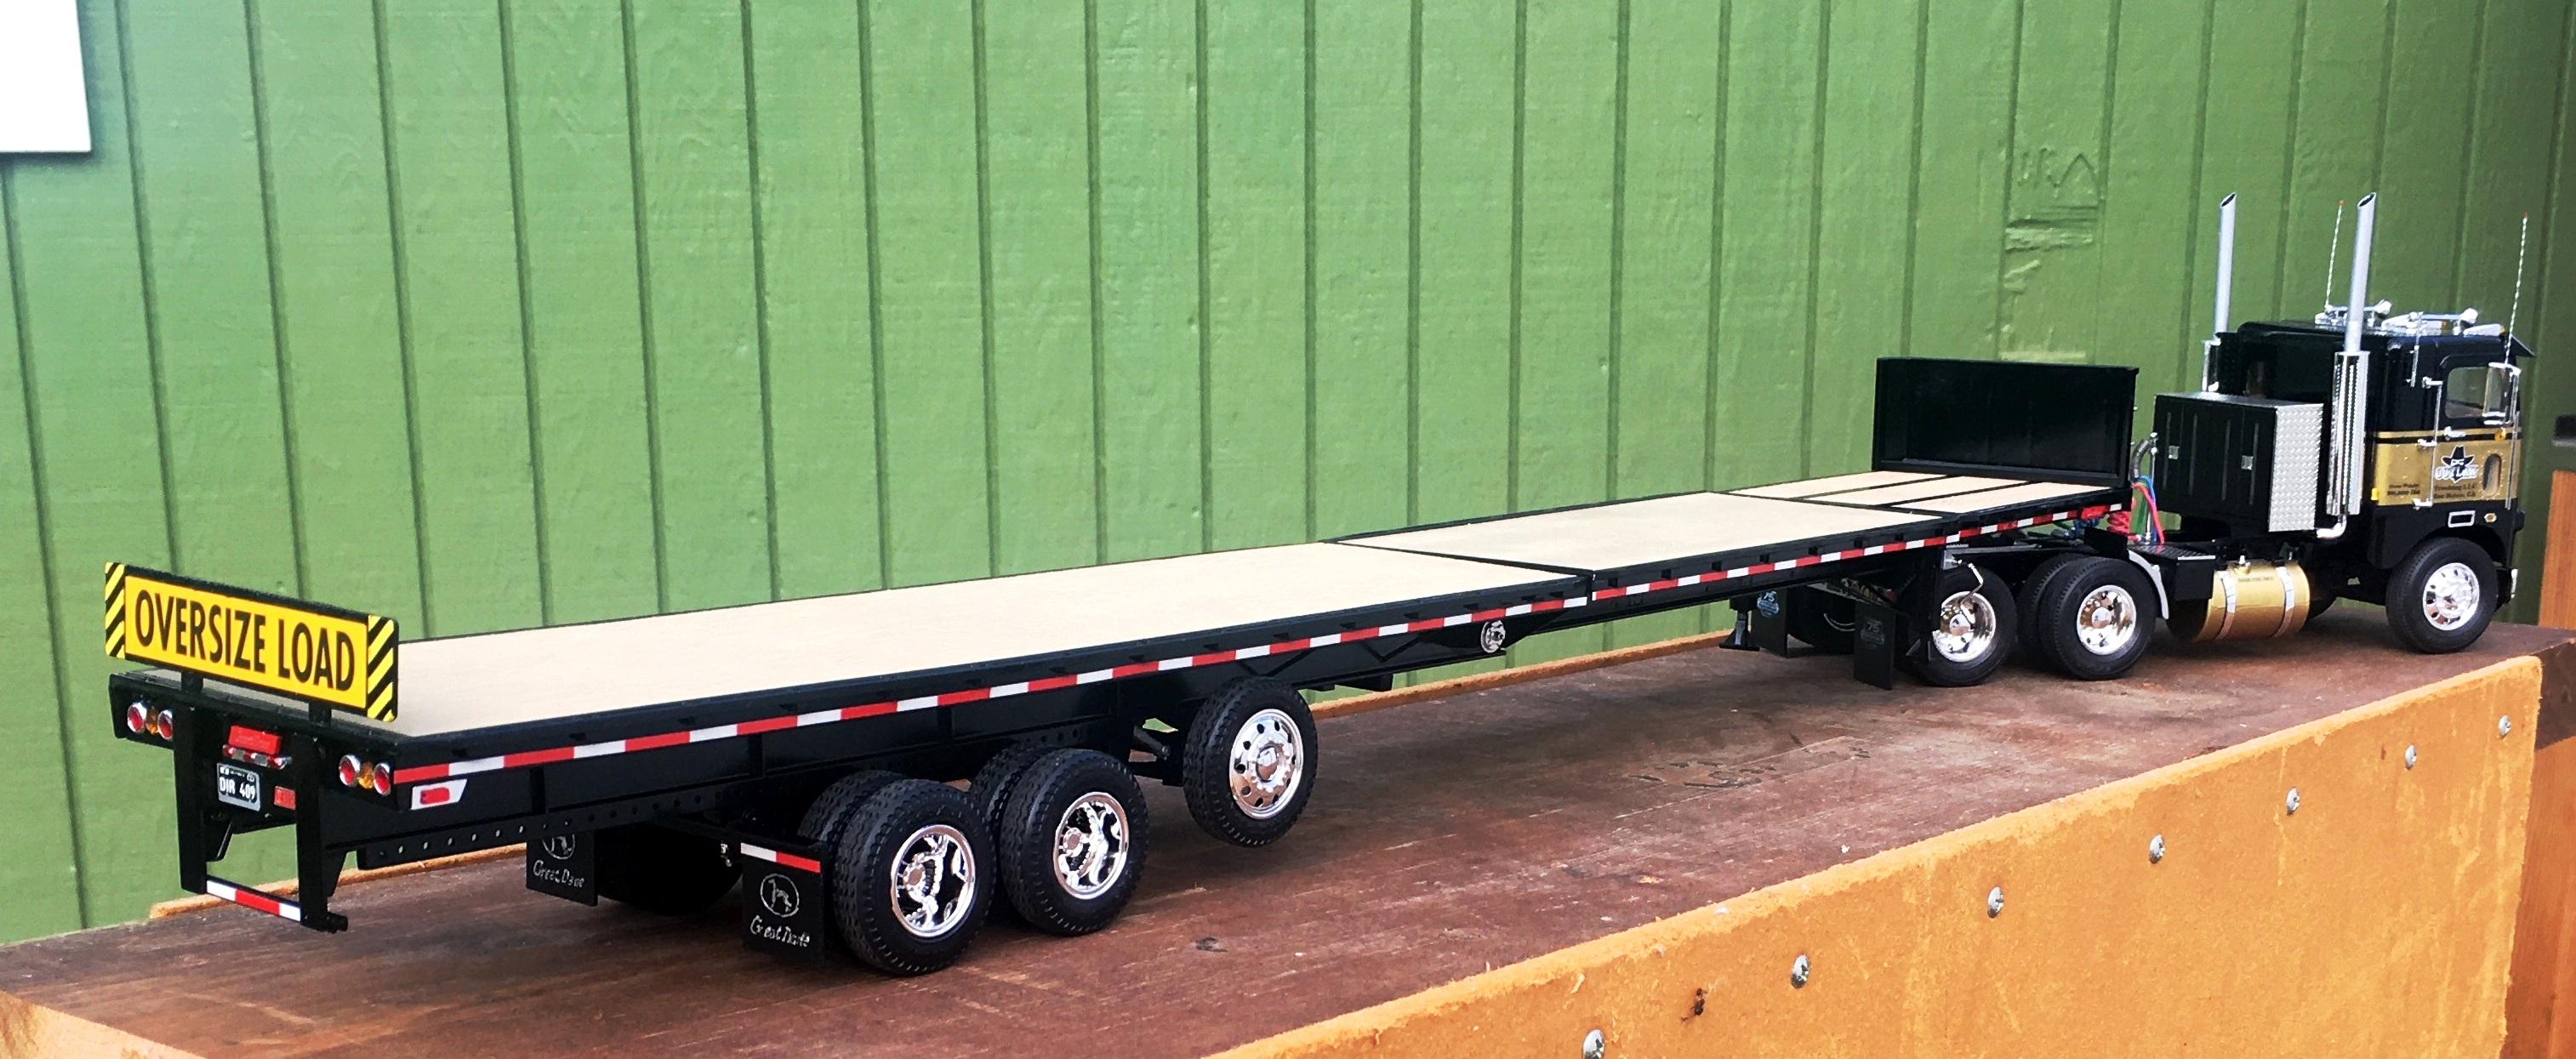
I finished my AMT Great Dane extendable flatbed trailer. I had a break in the weather and took it outside for some pics. Some mods were done to it to customize it. The front bulkhead is held in place with hidden magnets allowing its removal. A deck extension was scratch built to increase the length of the deck for larger loads. A tag axle was added to improve the GVWR. A rear "Oversized Load" placard was scratch built since the decal was included in the kit. It is being pulled by my Freightliner DD day cab I finished last year. It will eventually be loaded up with Plymouth Superbirds and Dodge Daytonas. (I have to build them first) Comments welcome. Here is the link to the WIP thread: http://www.modelcarsmag.com/forums/topic/166411-great-dane-extendable-flatbed-with-mods-planned/

-
BRBO 2022
Bills72sj replied to JerseeJerry55's topic in WIP: Model Trucks: Big Rigs and Heavy Equipment
I am in. I succeeded in 2020 but failed in 2021 (too ambitious of a project). However, I have plenty of subjects purchased the last couple of years to let me get SOMETHING to contribute. Sign me up. -
I agree completely. I used to have 5 (give or take) car magazine subscriptions hitting my mail box for years. Now I only have two left. Hot Rod and Hemmings Muscle Machines. Other magazine reviews of cup holders in the latest generic mini-SUV or the latest $250,000 exotic have no interest to me. I have found my solution though. I have saved all my car magazines in boxes since the late 80's. I just cracked a couple of them open and now sprinkle them in to my reading rack. Is the info dated? Sure. Do I remember reading the articles I read 30 years ago? Nope. The cars are still pretty cool and best of all they are FREE. I now have another 30 years of (recycled) magazines to enjoy.
-
1973 Ford F100
Bills72sj replied to Gerald Haney's topic in Model Trucks: Pickups, Vans, SUVs, Light Commercial
Sweet and Low! I like the seat belt retractors and the fact that you hinged to doors. Cool wheels too. -
The interior looks superb. I wish i could contract you to do mine for me.
-
I have been watching K.O.T.M. off and on for about a year. Quite entertaining
-
Unmasked and decaled the last piece today. After the touch up paint dries I can clear coat it and call it done.
-
I got my Christmas present early this year. Thanks MOM!
- 39,080 replies
-
- 1
-

-
- johan
- glue bombs
- (and 1 more)
-
Made a minor upgrade to the workshop. Took down the yellow Yenko hood with the carb fire damage and replaced it with a 69 Torino 428 Cobra Jet hood. Also added some more aluminum backed license plates.
-
I am liking the front bumper blacked out. I suggest cranking down the front torsion bars to lower the front a bit.
-
That interior is quite impressive. You could easily fool most people that it is a 1:1.
-
Dan, I simply hunted through the parts box to find something that was already triangular. A little bit of sanding a hole drilled and Voila! The EVENTUAL display load will be Winged Warriors. Superbirds and/or Charger Daytonas.